Masternode Wallet Setup
Step 1
We need to add the “Masternode Tab” in the $Pac wallet.
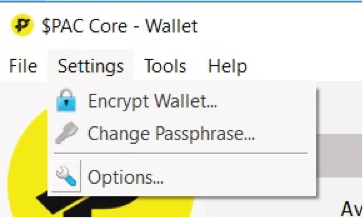
Click on setting > options
Click on Wallet Tab
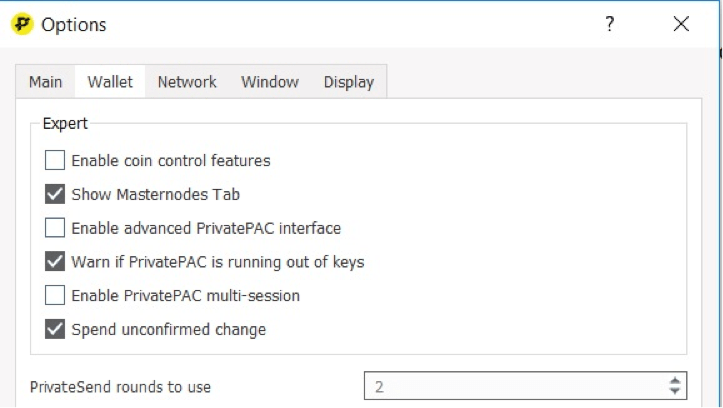
Select “show Masternode tab”
Click OK
Exit the wallet and restart
Step 2
Open a text editor such as notepad or sublime, leave blank to store information.
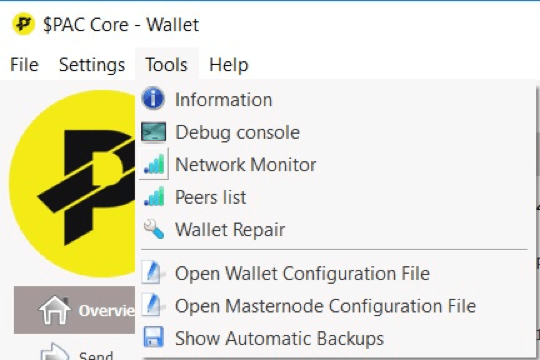
In your $Pac wallet select > Tools > Debug Console
Then select the console tab.
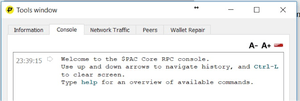
Create a masternode genkey by typing:
masternode genkey
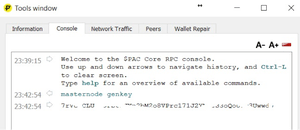
The Masternode genkey will appear in the console. Copy and paste it to your notepad. Make sure to label it MN1.
Keep all of your information together we will use it later on.
Step 3
Next you will need to send 500,000 $PAC coins to yourself. Click Receive on left menu on under $Pac Logo.
Type MN1 in label box. Type 500000 in the amount box Click request payment. Copy address.
Click Send on left menu on under $Pac Logo.
Paste the request address you just created. Once pasted the Label should automatically say MN1 so you know the coins are going back to your wallet and not to someone else. For a precaution you can double check the first and last few characters on the send address and receive address.
Step 4
Once you have 15 conformations (check by mousing over payment in transaction window) go back to the debug/console window and type:
masternode outputs
and press enter.
Copy the Masternode outputs to your notepad so we can correctly format it for later use.
The code you paste will look like
{

e4chhijdjjinshhjj65jdkkrjjrjjf7jjs8ejdjjkkdk :1

}
Now To format the Masternode outputs code remove non-alphanumeric characters (brackets and colon) so it looks like this:
e4chhijdjjinshhjj65jdkkrjjrjjf7jjs8ejdjjkkdk 1
Make sure to keep the “space” at the end between long address and last number.
VPS SETUP
Get a VPS system for your masternode(s)
I will use vultr for my instructions. Register / login with vultr.
Feel free to use my reflink to signup and receive a bonus w/ vultr:

Deploy a new system
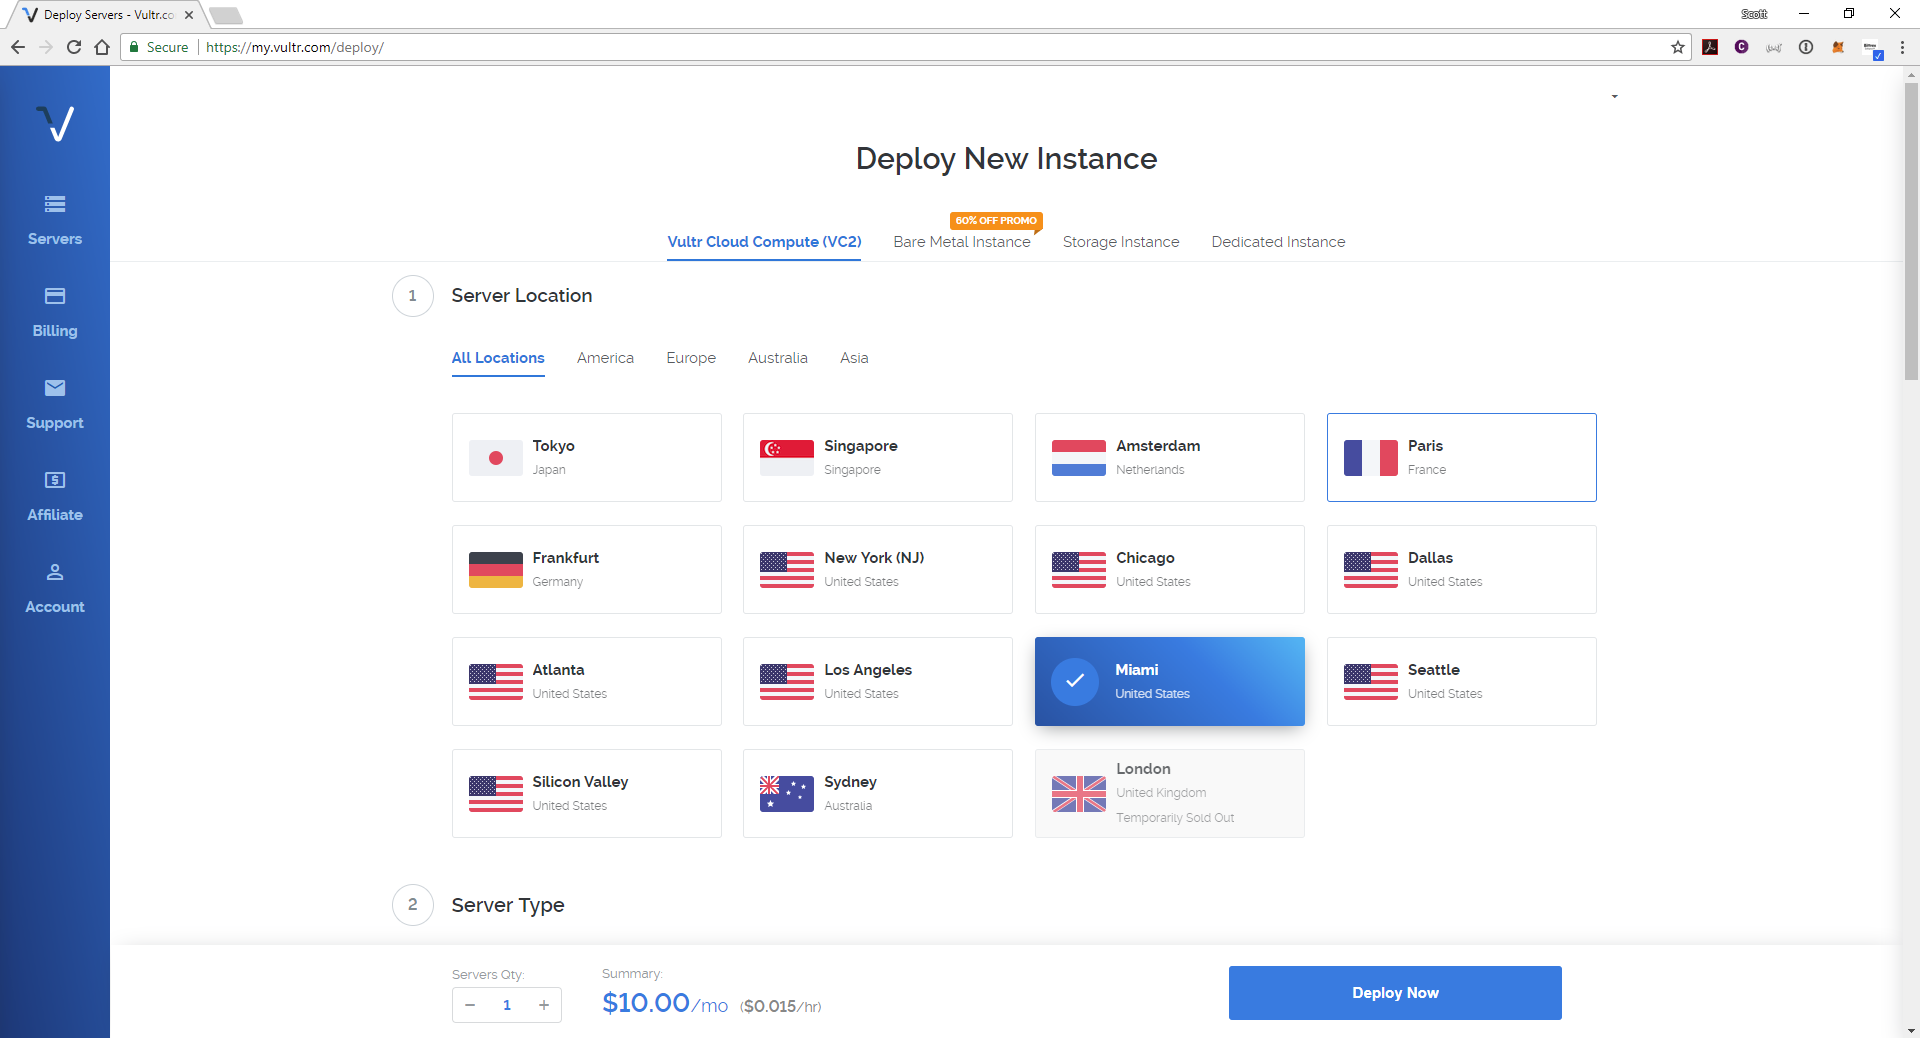
First, create a new VPS by clicking that small “+” button.
Location choice
The location doesn’t matter too much. If in doubt, choose a location near you.
Linux distribution (Ubuntu 16.04 LTS)
Select Ubuntu 16.04 x64.
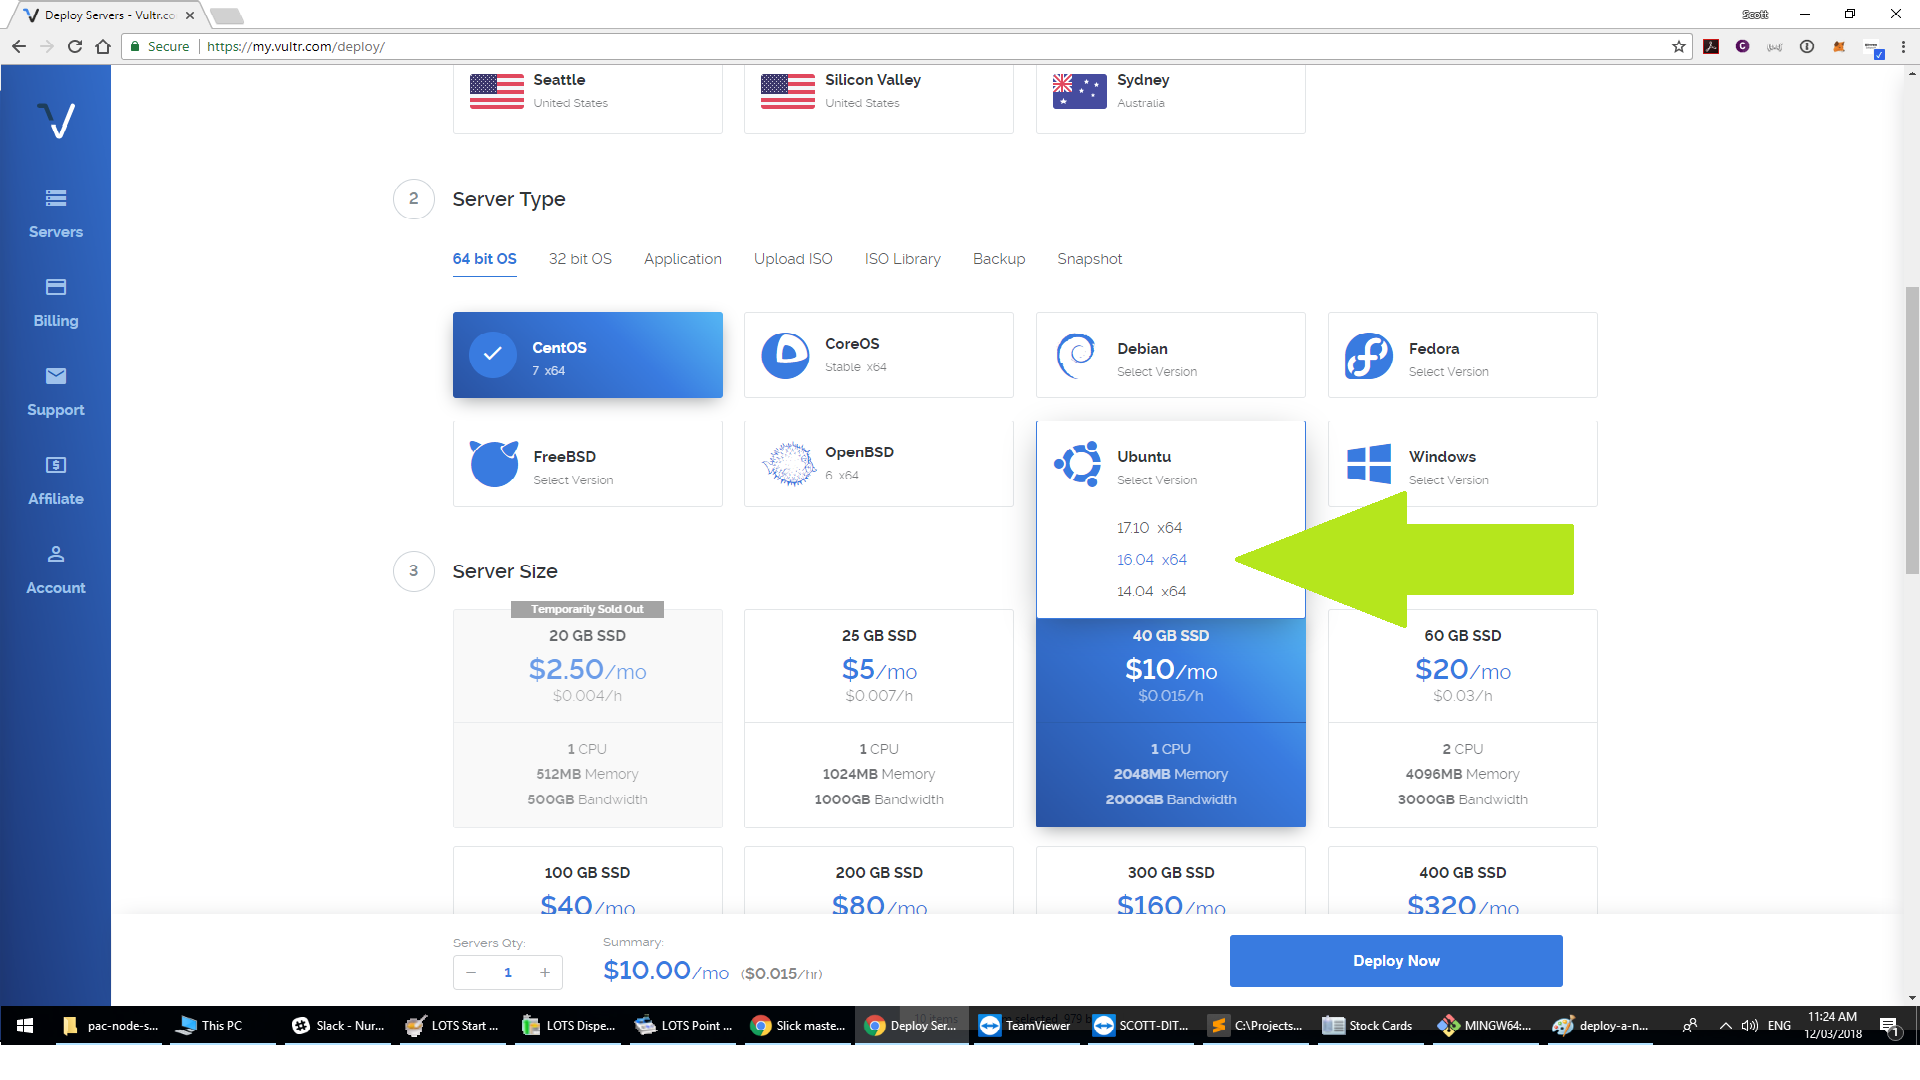
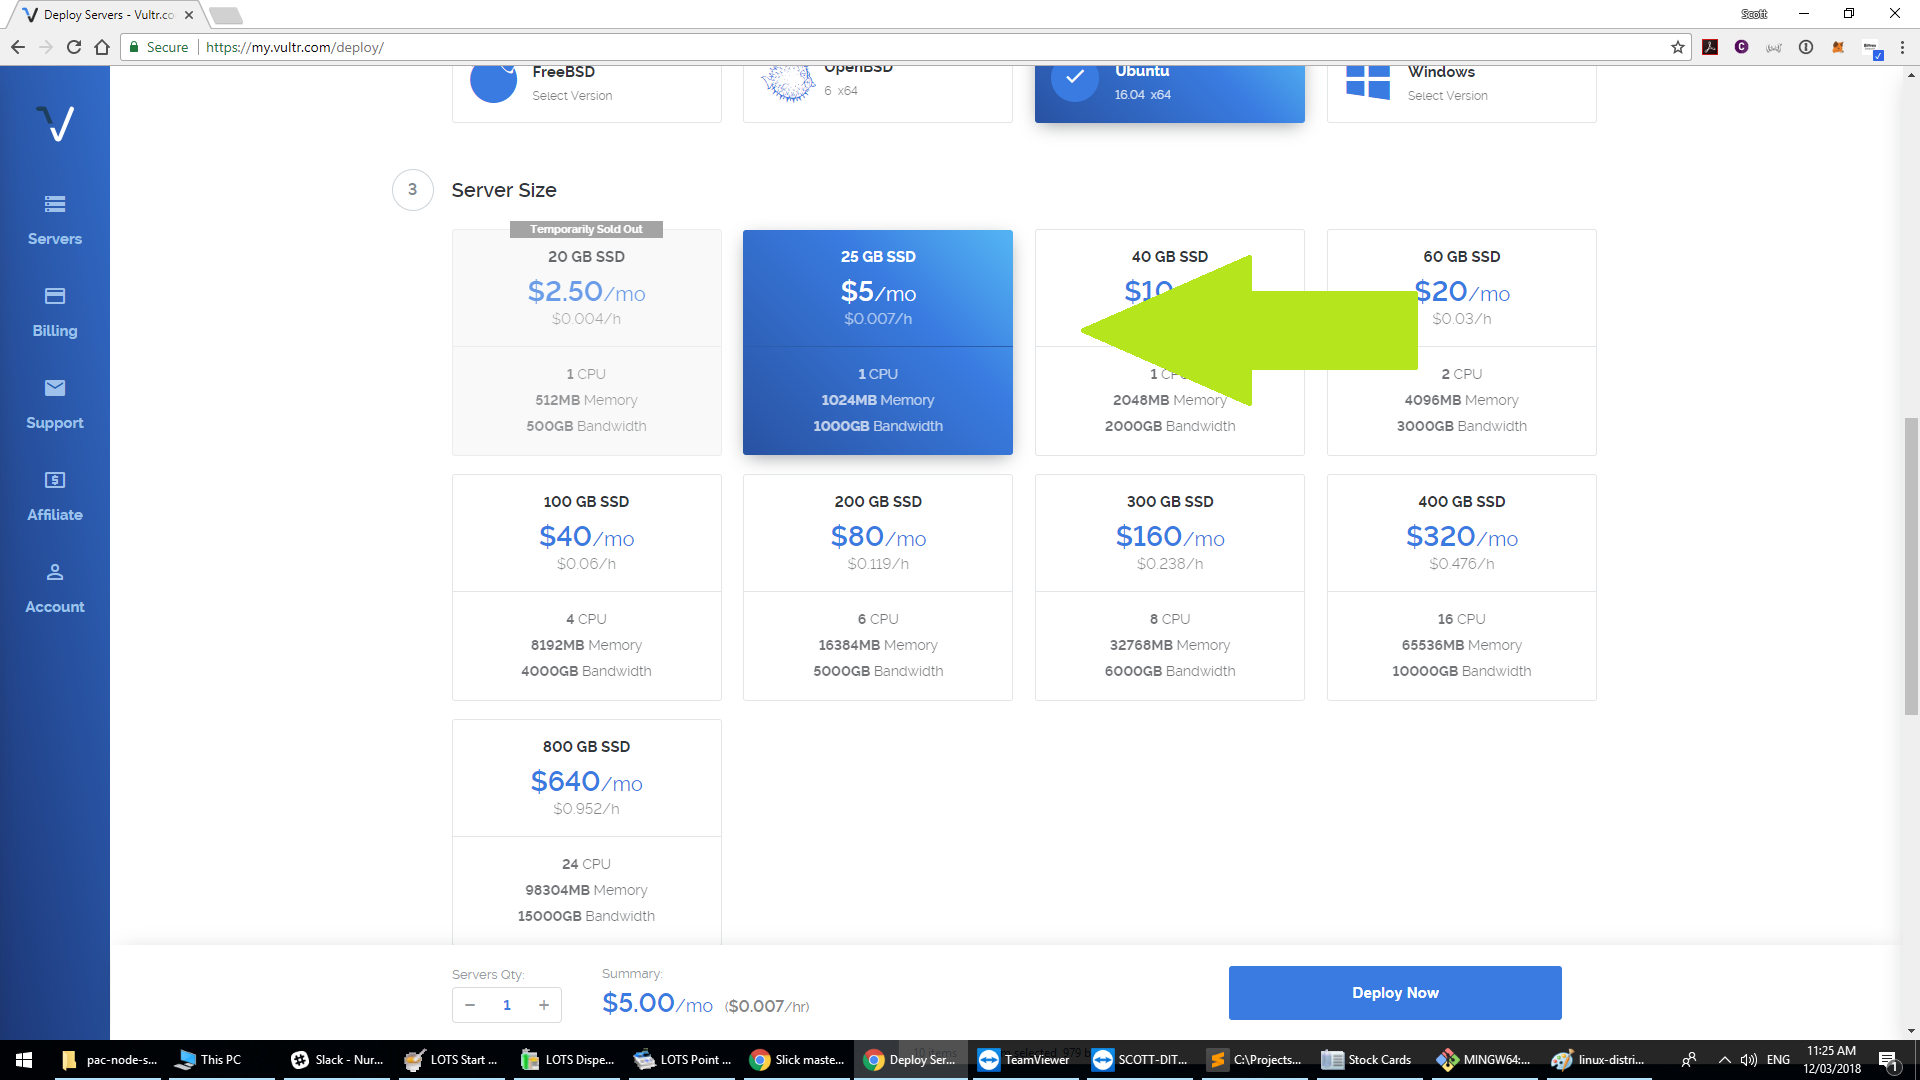
VPS size
A decent masternode needs a bit of RAM and some storage space. The $5 instance is good enough.
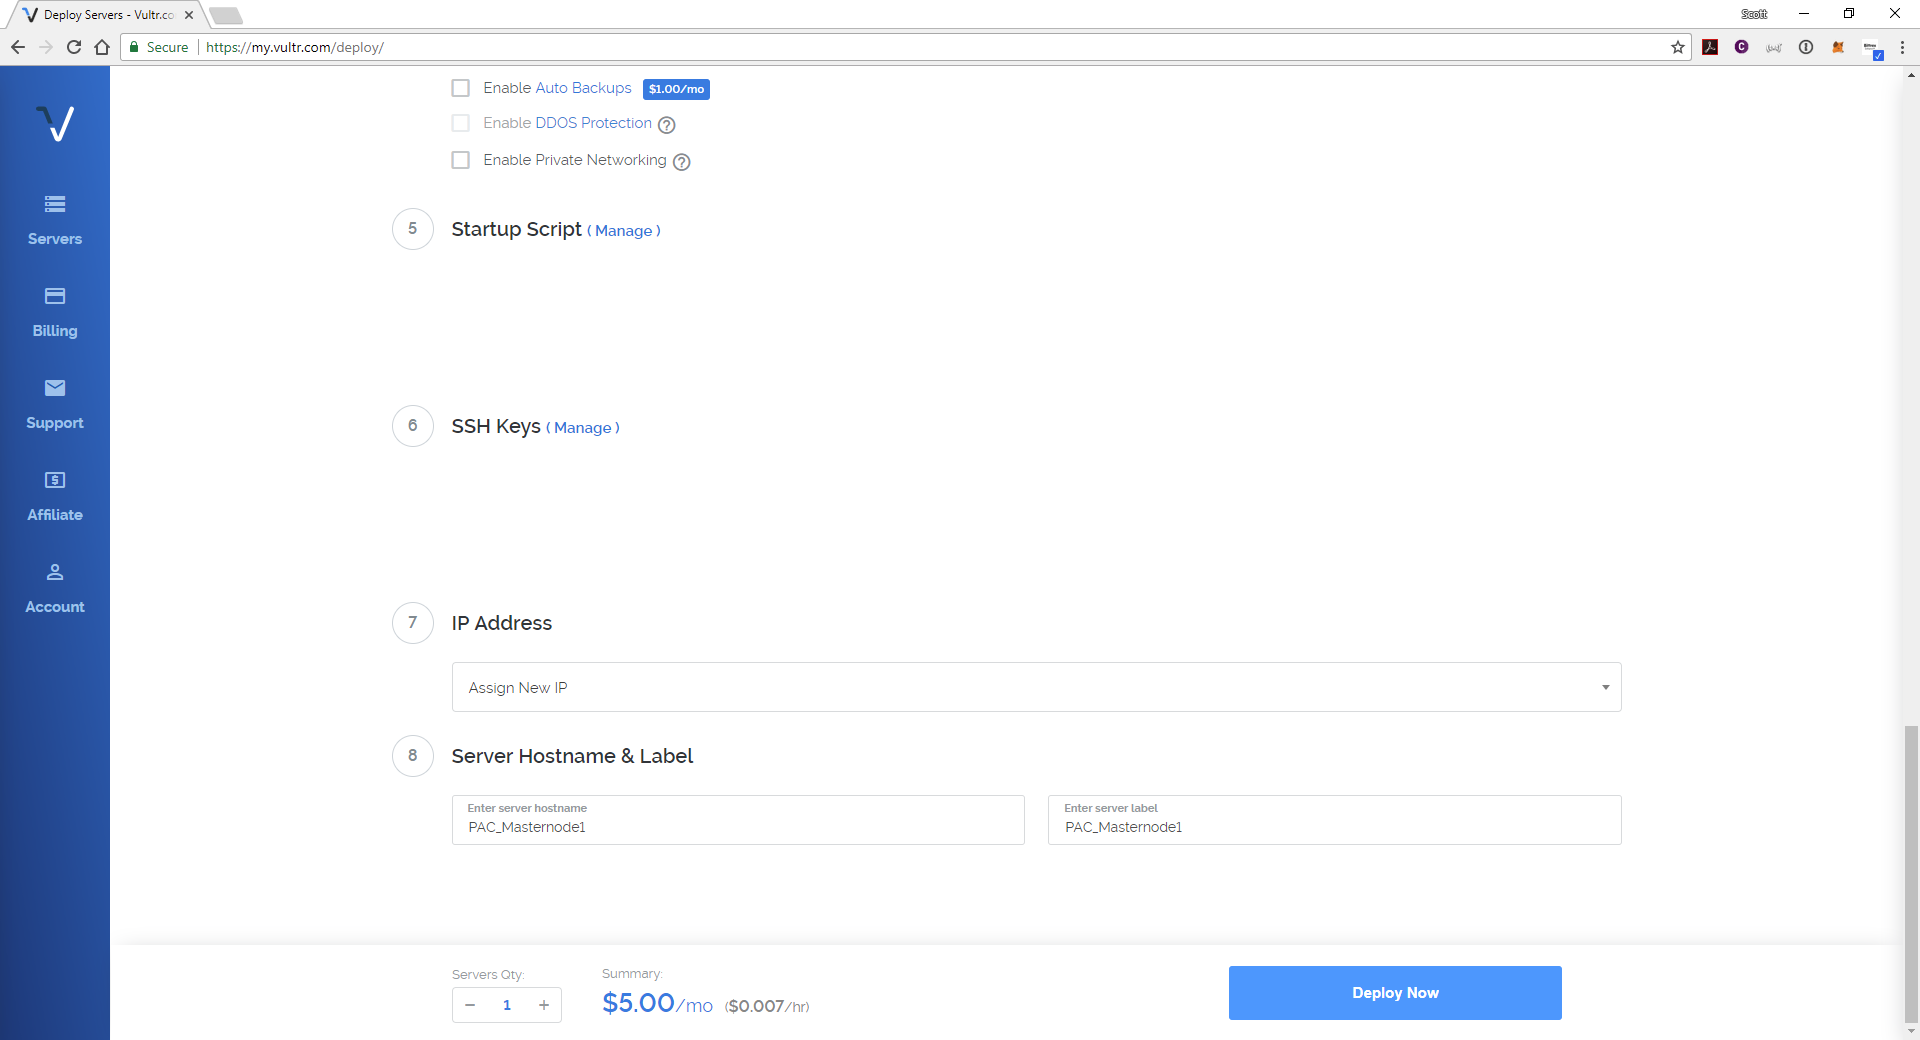
Hostnames
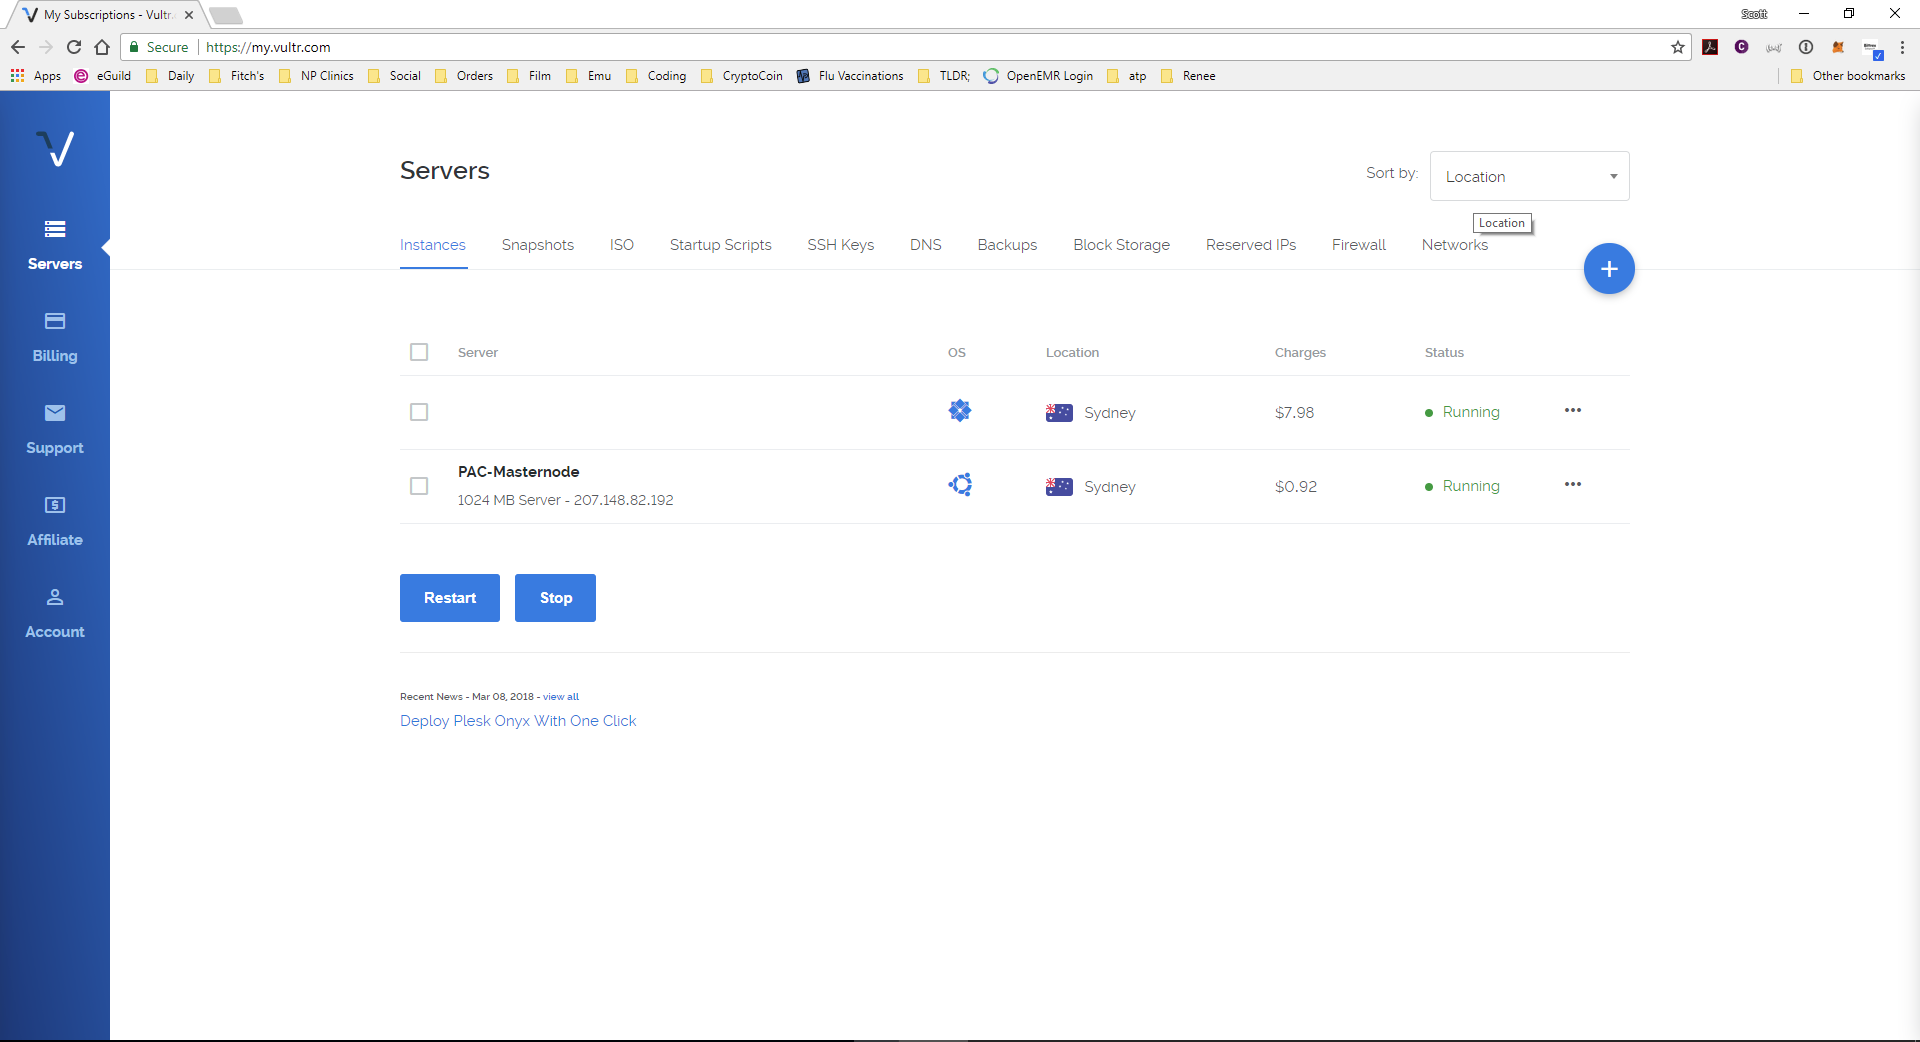
Choose a hostname you want and click “Deploy Now”. I called mine :
PAC_Masternode1
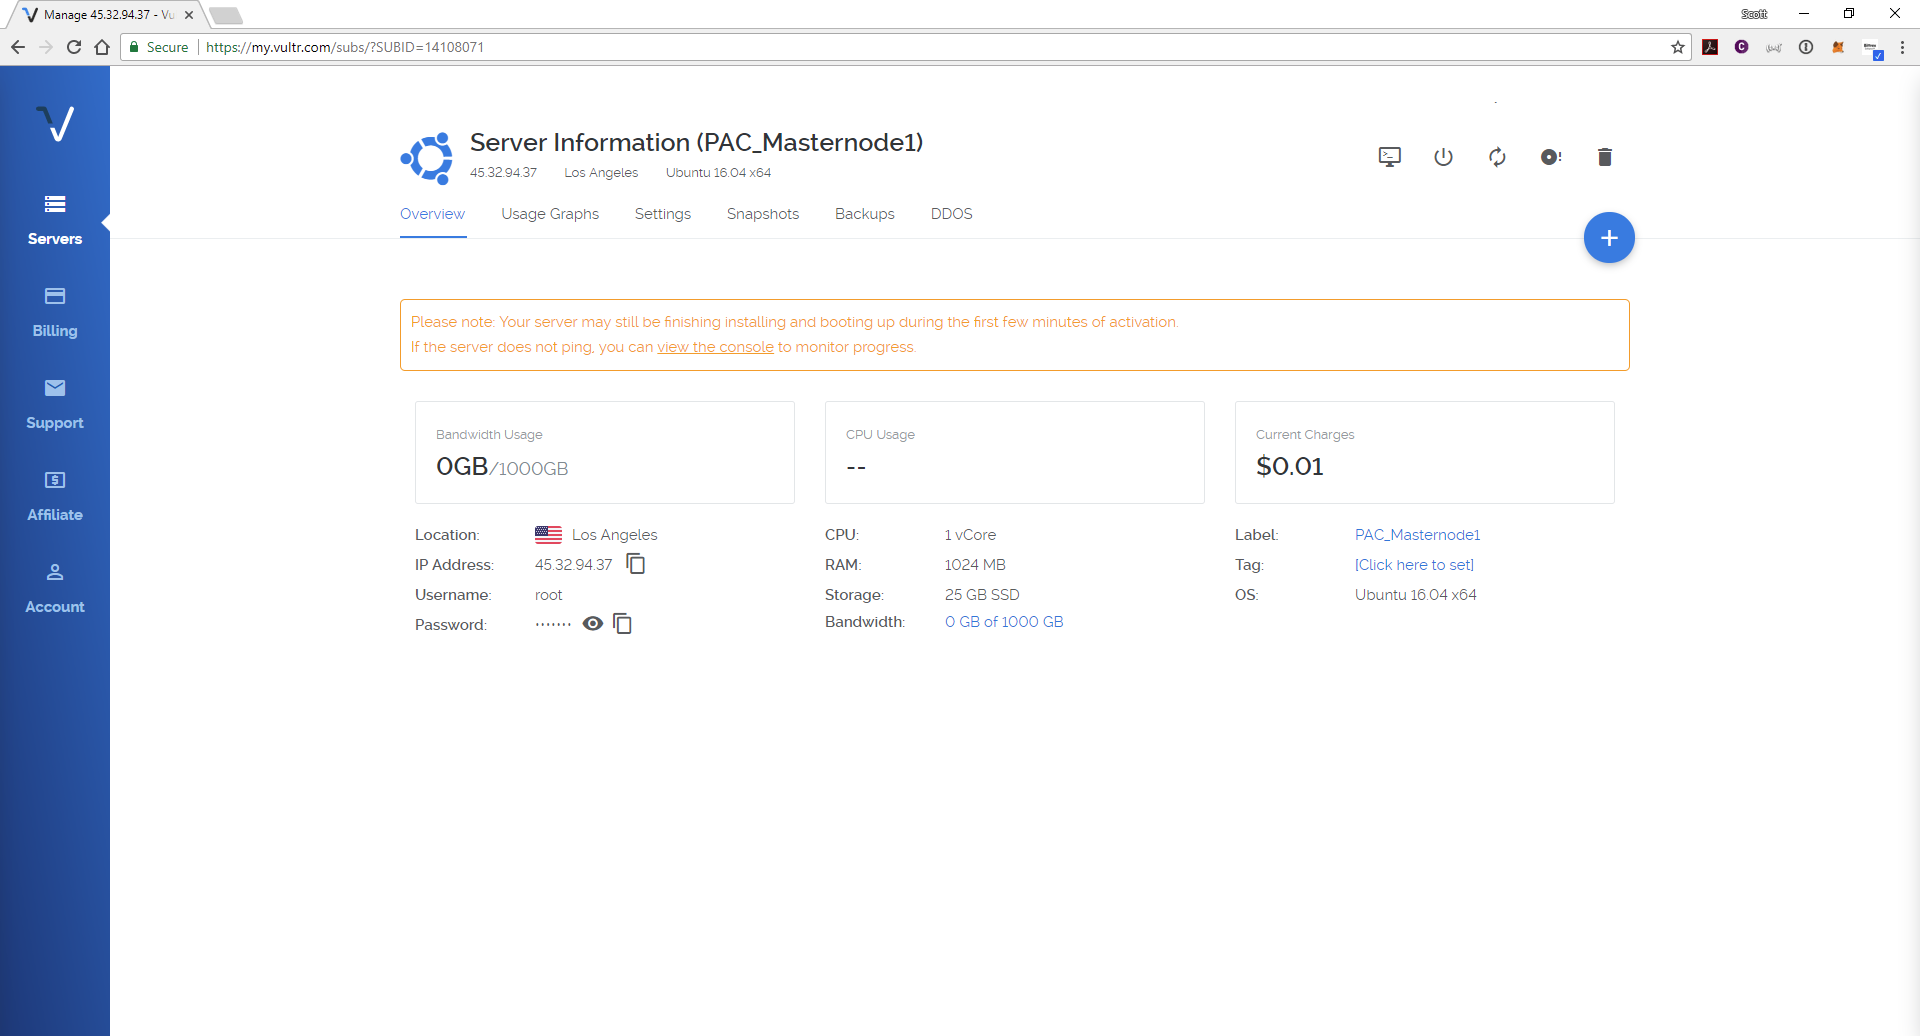
Accessing your VPS via SSH
Copy access credentials for SSH access by opening the server details.
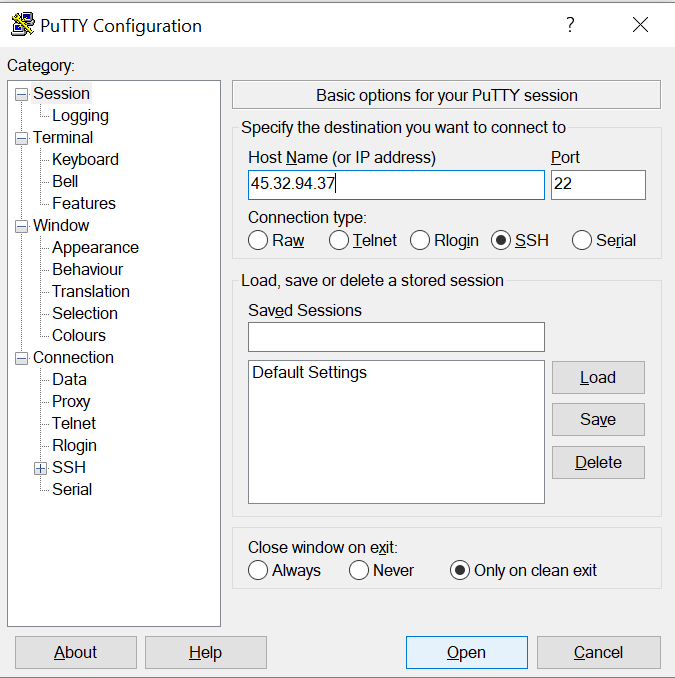
First SSH session
(Windows 7, 8, 9 & 10) Download Putty http://www.putty.org/
Type ypur IP address from vultr into the Hostname and press Open.
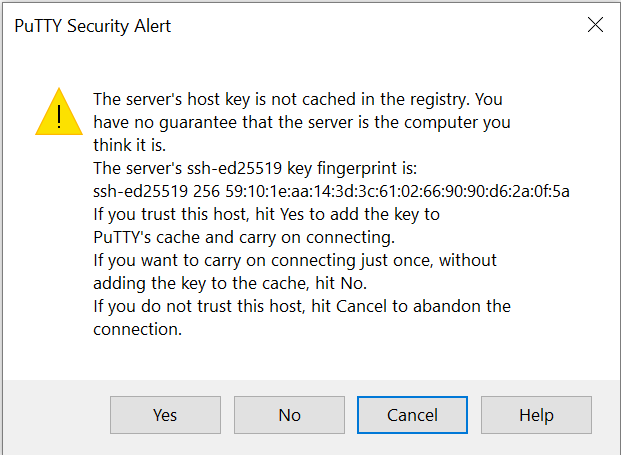
An authentication screen may popup something like this (below) press Yes to continue
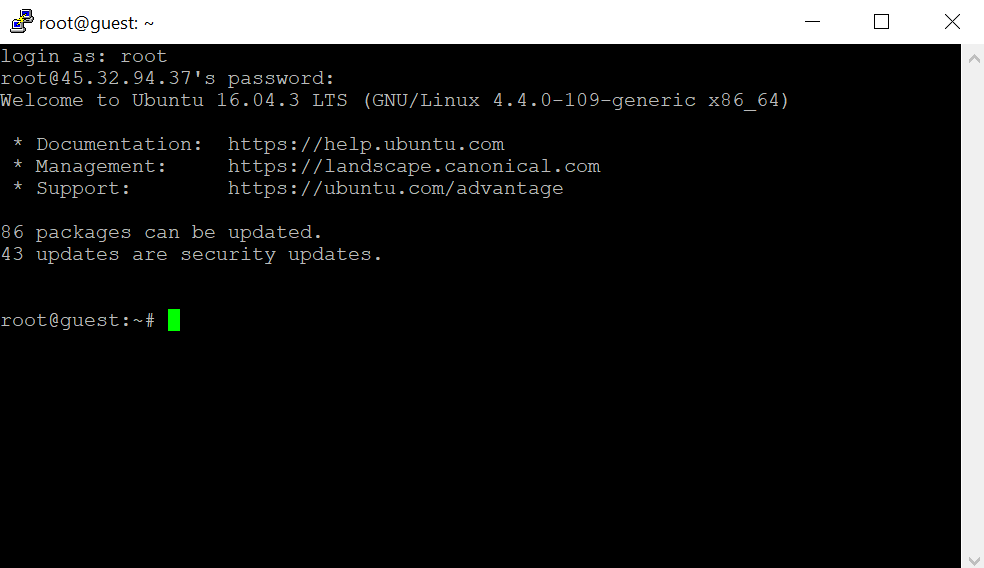
It will ask for your username so enter:
root
It will then ask for the password. Copy it across from you Vultr dashboard.
If you are using Putty: To paste your password just click the right mouse button, you will not see anything - it’s normal, press ENTER.
You should end up with a screen like below:
Masternode script installation
Copy the following and press enter.
wget https://raw.githubusercontent.com/PACCommunity/PAC/master/pacmn.sh
Once the script has downloaded type:
chmod +x pacmn.sh
Wait for the command to finish then type:
./pacmn.sh
The script will prompt for your external IP address from Vultr. Copy or type it, then press enter.
Then it will ask for the masterenode genkey that you generated earlier. Copy it across and and press enter.
The script downloads, compiles and configures the system now. This will usually take between 5-15 minutes.
Step 5
Now go back to your wallet click Tools > open masternode configuration file.
We want to add in a line with the following details. Pay attention to the spacing:
<Name of Masternode(Use the name you entered earlier for simplicity)> <Vultr IP address>:7112 <The result of Step 2> <Result of Step 4> <The number after the long line in Step 4>
Substitute it with your own values and without the <>’s So it should look like something below:
MN1 192.168.0.1:7112 PEzekAsRvh9Ej9s6RZLoAi8f265xAYb6kX e4chhijdjjinshhjj65jdkkrjjrjjf7jjs8ejdjjkkdk 1

Exit then restart the wallet
Go to masterernode tab
click the “start alias” button click okay to start MN1.
Now to test that everything is up and running. From putty type the following:
./paccoin-cli masternode status
It should output something similar to
{
  "outpoint": "f5abcdabcdabcdabce4d1ab87a32a8c848d554c935a89b46c3f7cd1fc8b4c-                                                                                                                 1",
  "service": "192.168.1.1:7112",
  "payee": "P56742312345678945612345679wXgzXDa6FFydG",
  "status": "Masternode successfully started"
}
Visit one of the following websites and search for your IP address from Vultr.
http://monitor.masternodes.work/monitor
http://pacmaster.nomukaiki.com/#!masternodes
You should see ypur IP address as Enabled with a status of Activetime.
ActiveTime Node has not been active for more than # of Masternodes * 2.6 minutes
It will take approx 3-4 days before activetime changes and Payable is enabled. You will then be randomlly selected for a masternode payment when you are in the top 10%.
Troubleshooting the masternode on the VPS
If you want to check the status of your masternode, the best way is currently running the paccoin-cli on your VP
start daemon
./paccoind
Stop daemon
./paccoin-cli stop
Masternode status
./paccoin-cli masternode status
./paccoin-cli getinfo
How to make sure the daemon always runs after errors or server restarts
In putty type the following
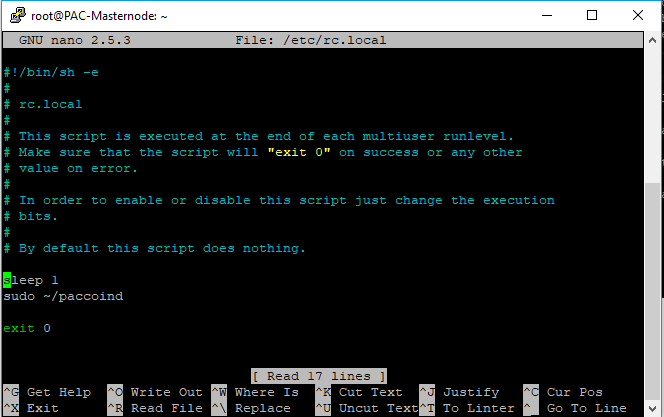
nano /etc/rc.local
copy the following lines and press the key down button to paste it just above “exit 0”:
sleep 1
sudo ~/paccoind
Then type CTRL+O -> ENTER -> CTRL+X (to save the changes and exit to command line).
It should look like this
Useful Websites
- http://monitor.masternodes.work/monitor
- http://pacmaster.nomukaiki.com/#!masternodes
Credits
- http://altcoin-guide.com/paccoin-vps-masternode-guide/
- http://monitor.masternodes.work/monitor
- http://pacmaster.nomukaiki.com/#!masternodes
- https://discord.gg/SdYuCm
Donations
- $PAC - PAgYbqC18zjJA3vbuuXYKMbhdyxovCJDhZ
- BTC - 33nXMpUbCEEK68Xb711Eda5Fn9vsyQWvMe